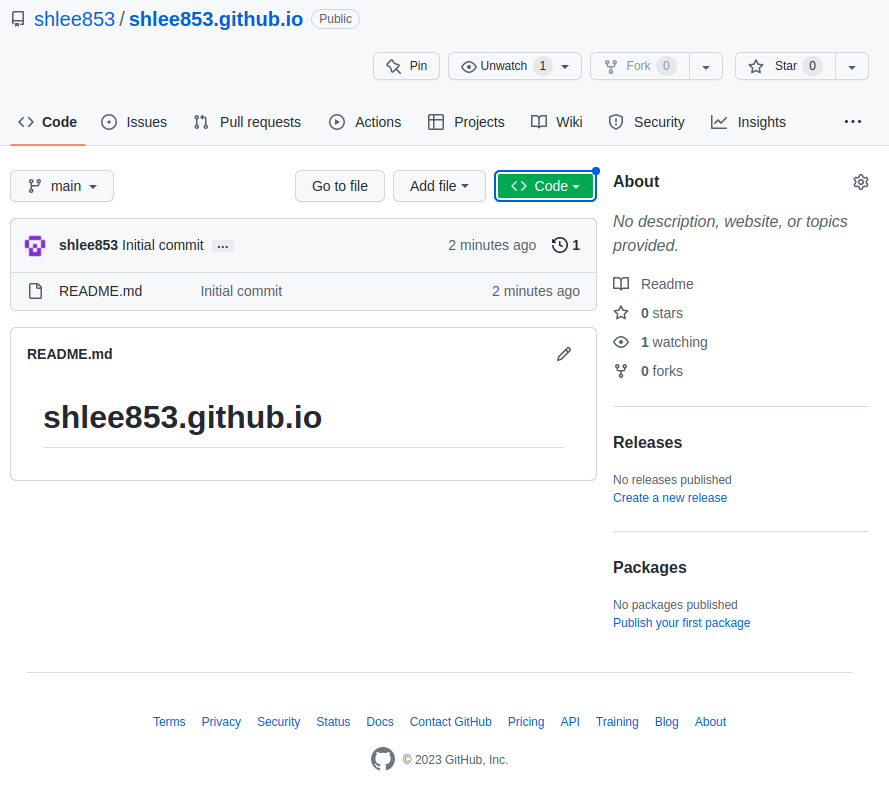
1. Github에서 새로운 Repository 생성하기
- repository name에 반드시 username.github.io로 새로운 repository를 만들어주어야 한다.

Create repository 하면 아래와 같이 메인 페이지가 보이는 repository가 생성된다.

2. Local로 내려받기
- 녹색으로 된 Code 버튼을 클릭하면 나의 주소를 복사할 수 있다. https://github.com/shlee853/shlee853.github.io.git
- 내려받을 폴더를 지정하고, 터미널을 열어서 아래 명령어로 remote에서 local로 자료를 내려받는다.
swift@swift-HP-Pavilion-dv6-Notebook-PC:~/workspace/git$ git clone https://github.com/shlee853/shlee853.github.io.git
Cloning into 'shlee853.github.io'...
remote: Enumerating objects: 3, done.
remote: Counting objects: 100% (3/3), done.
remote: Total 3 (delta 0), reused 0 (delta 0), pack-reused 0
Unpacking objects: 100% (3/3), 597 bytes | 597.00 KiB/s, done.
3. Local에서 홈화면 생성하기
- 내려받은 폴더로 이동하여 index.html 파일을 작성한다.
$ echo "Hello World" > index.html
swift@swift-HP-Pavilion-dv6-Notebook-PC:~/workspace/git$ ll
total 12
drwxrwxr-x 3 swift swift  4096  1월 26 14:19 ./
drwxrwxr-x 5 swift docker 4096  1월 26 14:18 ../
drwxrwxr-x 3 swift swift  4096  1월 26 14:19 shlee853.github.io/

swift@swift-HP-Pavilion-dv6-Notebook-PC:~/workspace/git$ cd shlee853.github.io/

swift@swift-HP-Pavilion-dv6-Notebook-PC:~/workspace/git/shlee853.github.io$ ll
total 16
drwxrwxr-x 3 swift swift 4096  1월 26 14:19 ./
drwxrwxr-x 3 swift swift 4096  1월 26 14:19 ../
drwxrwxr-x 8 swift swift 4096  1월 26 14:19 .git/
-rw-rw-r-- 1 swift swift   20  1월 26 14:19 README.md

swift@swift-HP-Pavilion-dv6-Notebook-PC:~/workspace/git/shlee853.github.io$ echo "Hello World" > index.html

swift@swift-HP-Pavilion-dv6-Notebook-PC:~/workspace/git/shlee853.github.io$ ll
total 20
drwxrwxr-x 3 swift swift 4096  1월 26 14:26 ./
drwxrwxr-x 3 swift swift 4096  1월 26 14:19 ../
drwxrwxr-x 8 swift swift 4096  1월 26 14:19 .git/
-rw-rw-r-- 1 swift swift   12  1월 26 14:26 index.html
-rw-rw-r-- 1 swift swift   20  1월 26 14:19 README.md
4. Remote로 수정된 파일을 업로드후 확인
- git 명령어를 이용하여 수정된 파일을 staging 공간으로 이동하고 remote 영역으로 push한다.
$ git add --all
$ git commot -m "Initial Release"
$ git push -u origin main
swift@swift-HP-Pavilion-dv6-Notebook-PC:~/workspace/git/shlee853.github.io$ git add --all

swift@swift-HP-Pavilion-dv6-Notebook-PC:~/workspace/git/shlee853.github.io$ git config user.name "shlee853"

swift@swift-HP-Pavilion-dv6-Notebook-PC:~/workspace/git/shlee853.github.io$ git config user.email "seunghyun.lee853@gmail.com"

swift@swift-HP-Pavilion-dv6-Notebook-PC:~/workspace/git/shlee853.github.io$ git commit -m "Initial Release"
[main 4c3f31d] Initial Release
 1 file changed, 1 insertion(+)
 create mode 100644 index.html

swift@swift-HP-Pavilion-dv6-Notebook-PC:~/workspace/git/shlee853.github.io$ git push -u origin main
Username for 'https://github.com': shlee853
Password for 'https://shlee853@github.com':
Enumerating objects: 4, done.
Counting objects: 100% (4/4), done.
Delta compression using up to 8 threads
Compressing objects: 100% (2/2), done.
Writing objects: 100% (3/3), 294 bytes | 294.00 KiB/s, done.
Total 3 (delta 0), reused 0 (delta 0)
To https://github.com/shlee853/shlee853.github.io.git
   a05ba84..4c3f31d  main -> main
Branch 'main' set up to track remote branch 'main' from 'origin'.
remote를 새로고침하면 index.html이 업로드되어 있는 것을 확인할 수 있다.

새로 브라우저를 열어서 주소창에 username.github.io를 입력하면 index.html의 내용이 나타난다.
아주 심플하지만 본인의 홈페이지가 만들어졌다.

'엔지니어링 > 프로그래밍' 카테고리의 다른 글
| Github.io 블로그 만들기(3) - Jekyll에 테마 적용하기 (0) | 2023.01.26 |
|---|---|
| Github.io 블로그 만들기(2) - Local 서버 설정 (0) | 2023.01.26 |
| Docker의 개념, 설치 및 사용방법 (2) | 2021.08.21 |
| [프로그래밍 일반] GIT 사용법 및 팁 (0) | 2021.08.18 |
| Ubuntu 20.04에서 VSCode를 이용하여 ROS 개발환경 구축하기 (4) | 2021.08.17 |


댓글