이전에 STM32보드에 CubeIDE를 이용하여 드론개발을 진행하였다. 편리한 GUI 인터페이스와 자동화 코드로 쉽게 구현할수 있어 장점이 많았다.
요즘 PX4 또는 github에서 오픈소스코드를 살펴보면 Nuttx OS 기반으로 비행제어 프로그램이 개발되어 있는 경우가 많아서 확장성을 고려하여 Nuittx OS 기반으로 프로그래밍을 개발하는 방법을 스터디해보고자 한다.
1. 하드웨어 준비
- 사용한 보드는 예전에 자작드론 개발시 사용했던 STM32F405RGxx 보드이다. 해당 보드는 omibus F4와 호환되는 보드로 LED, 자이로, PWM등을 온보드 형태로 사용할 수 있다. 보드에 대한 내용은 아래 포스팅을 참고하면 된다.
- 에뮬레이터는 J-Link를 사용한다.
https://swiftcam.tistory.com/83
[STM32 - 자작드론개발] 프로젝트 생성 및 디버그 LED 점멸
드론을 개발하기 위해서는 STM32 CPU와 자이로, 가속도 센서등 여러가지 센서가 필요하다. 직접 준비하려면 손이 많이 가게 되어 있지만 요즘 나오는 Racing 드론에 사용하는 FC(Flight Controller)에는 이
swiftcam.tistory.com
2. Nuttx OS 컴파일
- 지난 Nuttx OS 알아보기 포스팅의 2번 항목 Compile NuttxOS Source code 내용을 참고한다.
- configure에서 보드는 omnibusf4:nsh를 선택하여 컴파일한다.
$ ./configure.sh omnibusf4:nsh
  Copy files
  Select CONFIG_HOST_LINUX=y
  Refreshing...
CP: arch/dummy/Kconfig to /home/swift/workspace/git/nuttxspace/nuttx/arch/dummy/dummy_kconfig
CP: boards/dummy/Kconfig to /home/swift/workspace/git/nuttxspace/nuttx/boards/dummy/dummy_kconfig
LN: platform/board to /home/swift/workspace/git/nuttxspace/apps/platform/dummy
LN: include/arch to arch/arm/include
LN: include/arch/board to /home/swift/workspace/git/nuttxspace/nuttx/boards/arm/stm32/omnibusf4/include
LN: drivers/platform to /home/swift/workspace/git/nuttxspace/nuttx/drivers/dummy
LN: include/arch/chip to /home/swift/workspace/git/nuttxspace/nuttx/arch/arm/include/stm32
LN: arch/arm/src/chip to /home/swift/workspace/git/nuttxspace/nuttx/arch/arm/src/stm32
LN: arch/arm/src/board to /home/swift/workspace/git/nuttxspace/nuttx/boards/arm/stm32/omnibusf4/../common
LN: arch/arm/src/board/board to /home/swift/workspace/git/nuttxspace/nuttx/boards/arm/stm32/omnibusf4/src
mkkconfig in /home/swift/workspace/git/nuttxspace/apps/examples/mcuboot
mkkconfig in /home/swift/workspace/git/nuttxspace/apps/examples
mkkconfig in /home/swift/workspace/git/nuttxspace/apps/crypto
mkkconfig in /home/swift/workspace/git/nuttxspace/apps/audioutils
mkkconfig in /home/swift/workspace/git/nuttxspace/apps/gpsutils
mkkconfig in /home/swift/workspace/git/nuttxspace/apps/logging
mkkconfig in /home/swift/workspace/git/nuttxspace/apps/system
mkkconfig in /home/swift/workspace/git/nuttxspace/apps/boot
mkkconfig in /home/swift/workspace/git/nuttxspace/apps/fsutils
mkkconfig in /home/swift/workspace/git/nuttxspace/apps/benchmarks
mkkconfig in /home/swift/workspace/git/nuttxspace/apps/math
mkkconfig in /home/swift/workspace/git/nuttxspace/apps/interpreters/luamodules
mkkconfig in /home/swift/workspace/git/nuttxspace/apps/interpreters
mkkconfig in /home/swift/workspace/git/nuttxspace/apps/testing
mkkconfig in /home/swift/workspace/git/nuttxspace/apps/mlearning
mkkconfig in /home/swift/workspace/git/nuttxspace/apps/graphics
mkkconfig in /home/swift/workspace/git/nuttxspace/apps/netutils
mkkconfig in /home/swift/workspace/git/nuttxspace/apps/sdr
mkkconfig in /home/swift/workspace/git/nuttxspace/apps/canutils
mkkconfig in /home/swift/workspace/git/nuttxspace/apps/wireless/ieee802154
mkkconfig in /home/swift/workspace/git/nuttxspace/apps/wireless/bluetooth
mkkconfig in /home/swift/workspace/git/nuttxspace/apps/wireless
mkkconfig in /home/swift/workspace/git/nuttxspace/apps/games
mkkconfig in /home/swift/workspace/git/nuttxspace/apps/industry
mkkconfig in /home/swift/workspace/git/nuttxspace/apps
#
# configuration written to .config
https://swiftcam.tistory.com/665
NuttX OS 알아보기
개발 환경 장비: 노트북 OS: Ubuntu 20.04 타겟보드: STM32F407 에뮬레이터: SEGGER J-Link 1. 개발 환경설정 필수 패키지 설치 sudo apt-get install automake bison build-essential flex gcc-arm-none-eabi gperf git libncurses5-dev libt
swiftcam.tistory.com
3. NSH 콘솔 설정
- 해당 보드는 UART6를 시리얼 출력으로 사용하였기 때문에 menuconfig에서 serial console을 UART6으로 변경해주어야 한다.
$ make menuconfig
- 메뉴에서 Device drivers-> Serial driver support 를 선택하면 아래 화면이 나타난다. 메뉴중 Serial console을 USART6로 변경한다.

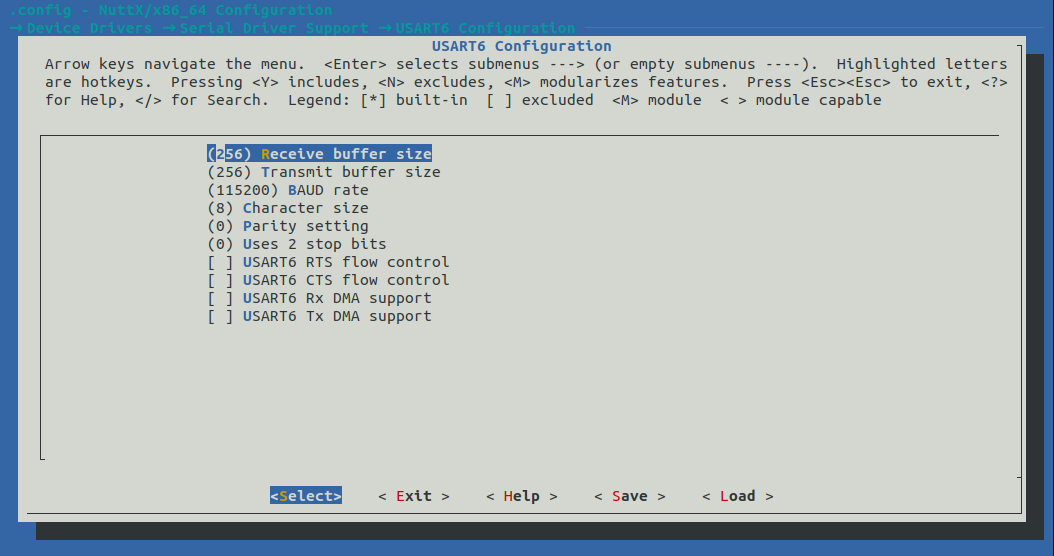
- USART6의 속성은 디폴트로 아래와 같이 정의되어 있고 수정할 필요없이 그대로 사용한다.
4. 보드에 Flashing 하기
- 디버그 기능없이 단지 보드에 플래시만 한다면 Jlink에서 제공하는 JFlash 프로그램을 이용할 수 있다. 아래 사이트에서 JLink_Linux_V786d_x86_64 프로그램을 다운받고 JFlashExe를 실행한다.
$ ./JFlashExe
- Create new project를 선택하고 Start J-Flash를 누른다.

- 새로운 프로젝트에서 디바이스를 선택하는데 Device탭에 'STM32F405RG'라고 타이핑하여 해당되는 보드를 선택한다.
- J-link를 사용하는 경우에 Target Interface는 SWD로 설정되어야 한다.
- OK를 누르면 되는데 이전에 J-link가 STM32F405보드와 연결되어 있어야 하고, 전원이 미리 인가되어야 한다.

- 메뉴중 Target -> Connect를 누르면 해당보드와 연결되어 정보가 아래와 같이 나타난다.
Connecting ...
 - Connecting via USB to probe/ programmer device 0
 - Probe/ Programmer firmware: J-Link V9 compiled May  7 2021 16:26:12
 - Probe/ Programmer S/N: -1
 - Device "STM32F405RG" selected.
 - Target interface speed: 4000 kHz (Fixed)
 - VTarget = 3.256V
 - InitTarget() start
 - SWD selected. Executing JTAG -> SWD switching sequence.
 - DAP initialized successfully.
 - InitTarget() end - Took 32.3ms
 - Found SW-DP with ID 0x2BA01477
 - DPIDR: 0x2BA01477
 - CoreSight SoC-400 or earlier
 - Scanning AP map to find all available APs
 - AP[1]: Stopped AP scan as end of AP map has been reached
 - AP[0]: AHB-AP (IDR: 0x24770011)
 - Iterating through AP map to find AHB-AP to use
 - AP[0]: Core found
 - AP[0]: AHB-AP ROM base: 0xE00FF000
 - CPUID register: 0x410FC241. Implementer code: 0x41 (ARM)
 - Found Cortex-M4 r0p1, Little endian.
 - FPUnit: 6 code (BP) slots and 2 literal slots
 - CoreSight components:
 - ROMTbl[0] @ E00FF000
 - [0][0]: E000E000 CID B105E00D PID 000BB00C SCS-M7
 - [0][1]: E0001000 CID B105E00D PID 003BB002 DWT
 - [0][2]: E0002000 CID B105E00D PID 002BB003 FPB
 - [0][3]: E0000000 CID B105E00D PID 003BB001 ITM
 - [0][4]: E0040000 CID B105900D PID 000BB9A1 TPIU
 - [0][5]: E0041000 CID B105900D PID 000BB925 ETM
 - Executing init sequence ...
  - Initialized successfully
 - Target interface speed: 4000 kHz (Fixed)
 - Found 1 JTAG device. Core ID: 0x2BA01477 (None)
 - Connected successfully
- 방금 nuttx 빌드한 폴더를 찾아가서 nuttx.hex 또는 nuttx.bin 파일을 드래그하여 JFlashExe 프로그램으로 가져온다. 0x08000000부터 파일의 내용이 보이기 시작하고 실제로 플래시하게되면 해당 영역에 파일을 그대로 플래시한다.

- 메뉴중 Target -> Production programming을 선택하면 STM32F405내 플래시메모리에 이전 내용을 삭제후 파일을 플래시한다. 아래와 같이 프로그래밍이 정상적으로 완료되었다는 메시지가 확인되어야 한다.

4. Nsh 확인하기
- 플래시가 끝나면 보드에 시리얼을 컴퓨터와 연결하고 전원을 껏다가 다시 인가한다.
- GTKTerm 터미널 프로그램을 연결한다. 연결시 보드의 속성과 같이 115200bps-8bit-No parity-1 stop bit로 설정한다.
- 엔터를 치면 아래와 같이 nuttx에서 프롬프트가 나타난다.

'엔지니어링 > 임베디드' 카테고리의 다른 글
| Ubuntu 22.04에 ROS2 humble 설치하기 (0) | 2025.01.12 |
|---|---|
| [ STM32 ] VS Code로 Nuttx OS 빌드 및 디버깅 환경설정하기 (0) | 2023.05.07 |
| NuttX OS 알아보기 (0) | 2023.03.16 |
| Docker로 Ubuntu 18.04 + ROS melodic 개발환경 구축 (0) | 2022.01.08 |
| [ ROS ] ROS CPP 패키지 생성하기 (2) | 2021.09.25 |


댓글